Home » Minerals » Mohs Hardness Scale
Mohs Hardness Scale
A rapid hardness test for field and classroom use
Article by: Hobart M. King, PhD
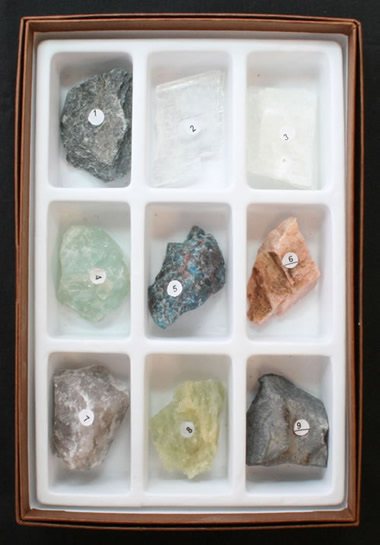
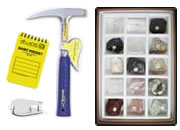
Mohs Hardness Kit: A Mohs Hardness Scale kit containing: (1) talc; (2) gypsum; (3) calcite; (4) fluorite; (5) apatite; (6) orthoclase; (7) quartz; (8) topaz; and (9) corundum. Diamond (10) is not included in most kits to keep the cost down. Also, a diamond specimen would be so small that it would need to be mounted in a handle to be useful. You can find Mohs Hardness Kits in the Geology.com Store.
What is Mohs Hardness Scale?
The Mohs Hardness Scale is a set of ten reference minerals (numbered 1 through 10) that are used to determine the relative hardness of minerals and other objects. In this test the hardness of a mineral is defined as its "resistance to being scratched". A list of the Mohs Hardness Scale Minerals is shown in the table below. A photo of a Mohs hardness kit is shown in the accompanying photo.
Table of Contents
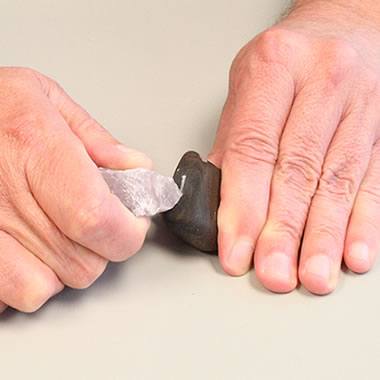
Mohs hardness test: When conducting the test, place the unknown specimen on a table top and firmly hold it in place with one hand. Then place a point of the reference specimen against a flat, unmarked surface of the unknown specimen. Press the reference specimen firmly against the unknown, and deliberately drag it across the flat surface while pressing firmly. To avoid injury, drag the known specimen away from your body and parallel to the fingers that are holding the unknown specimen.
How the Mohs Scale Works
If you have a mineral specimen of unknown hardness, and reference mineral #5 can scratch it, then the hardness of your specimen is less than or equal to a Mohs hardness of 5. Similarly, if your specimen cannot be scratched by reference mineral #5, then its hardness is greater than or equal to a Mohs hardness of 5.
By doing successive tests with different reference specimens, you can closely estimate the Mohs hardness of your mineral specimen.
The Mohs hardness of a mineral is important information for determining the identity of your specimen.
Discovering a Hardness Scale
Friedrich Mohs, a German mineralogist, discovered the hardness scale in 1812. He selected ten minerals of distinctly different hardness that ranged from a very soft mineral (talc) to a very hard mineral (diamond). With the exception of diamond, the minerals are all relatively common, easy to obtain, and inexpensive.
See the accompanying table of the Mohs Hardness Scale minerals.
The Mohs Hardness Scale has been used by geologists and geology students for over 200 years. Millions of students have used the Mohs Hardness Test to identify minerals. It is surprising that such a simple test has been in use for over two centuries.
Making Hardness Comparisons
"Hardness" is the resistance of a material to being scratched. The test is conducted by placing a sharp point of one specimen on an unmarked surface of another specimen and attempting to produce a scratch. Here are the four situations that you might observe when comparing the hardness of two specimens:
1. If Specimen A can scratch Specimen B, then Specimen A is harder than Specimen B.
2. If Specimen A does not scratch Specimen B, then Specimen B is harder than Specimen A.
3. If the two specimens are equal in hardness then they will be relatively ineffective at scratching one another. Small scratches might be produced, or it might be difficult to determine if a scratch was produced.
4. If Specimen A can be scratched by Specimen B but it cannot be scratched by Specimen C, then the hardness of Specimen A is between the hardness of Specimen B and Specimen C.
Mohs Hardness Testing Procedure
- Begin by locating a smooth, unscratched surface for testing.
- With one hand, hold the specimen of unknown hardness firmly against a table top so that the surface to be tested is exposed and accessible. The table top supports the specimen and helps you hold it motionless for the test. (If you are doing this test at a nice desk you may want to get a thick piece of cardboard, a thick rubber pad, or a sheet of some other material to protect the surface from being scratched.)
- Hold one of the standard hardness specimens in the other hand and place a point of that specimen against the selected flat surface of the unknown specimen.
- Firmly press the point of the standard specimen against the unknown specimen, and with firm pressure, drag the point of the standard specimen across the surface of the unknown specimen.
- Examine the surface of the unknown specimen. With a finger, brush away any mineral fragments or powder that was produced. Did the test produce a scratch? Be careful not to confuse mineral powder or residue with a scratch. A scratch will be a distinct groove cut in the mineral surface, not a mark on the surface that wipes away. Use a hand lens to get a good look at what happened.
- Conduct the test a second time to confirm your results.
Mohs Hardness of Common Minerals |
|
|
||||||||||||||||||||||||||||||||||||||||||||||||||||||||||||||||||||||||||||||||||||||||||||||||||||||||||||||||||||||||||||||||||||||||||||||||||||||||||||||||||||||||||||||||||||||||||||||||||||||||||||||||||||||||||||||||||||||||||||||||||||||||||||||||||||||||||||||||||||||||||||||||||||||||||||||||||||||||||||||||||||||||||||||||||||
Mohs Hardness Testing Tips
- A list of minerals in order of hardness can be a handy reference. If you determine that a specimen has a hardness of Mohs 4, you can quickly get a list of potential minerals.
- Practice and experience will improve your abilities when doing this test. You will become faster and more confident.
- If the hardness of the unknown specimen is about 5 or less, you should be able to produce a scratch without much exertion. However, if the unknown specimen has a hardness of about 6 or greater, then producing a scratch will require some force. For those specimens, hold the unknown firmly against the table, place the standard specimen against it, press firmly with determination, then holding pressure slowly drag the standard specimen across the surface of the unknown.
- Don't be fooled by a soft standard specimen producing a mark on a hard unknown. That mark is like what a piece of chalk produces on a blackboard. It will wipe off without leaving a scratch. Wipe your finger across the tested surface. If a scratch was produced, there will be a visible groove. If marks wipe away then a scratch was not produced. Check for the scratch with a hand lens.
- Some hard materials are also very brittle. If one of your specimens is breaking or crumbling rather than scratching, you will have to be very careful while conducting the test. Testing tiny or granular specimens can be difficult.
- Some specimens contain impurities. If the results of your test are not visibly conclusive, or if the information from your test does not conform with other properties, do not hesitate to do the test again. It is possible that a small piece of quartz (or another impurity) was embedded in one of your specimens.
- Don't be wimpy! This is a very common problem. Some people casually rub one specimen back and forth against another and then look for a mark. That is not how the test is done! It is done with a single, slow, determined motion, with firm pressure, with the goal of cutting a scratch.
- Be careful! When we test we carefully hold the rock being tested so that if the pick slips it will not punch a hole in our finger.
- When we do the hardness test, we place a thick sheet of heavy cardboard or a rubber pad on our table to protect its surface from being scratched.
- This test should be done on a lab table or work bench with a durable surface or a protective covering. Don't do this type of testing on fine furniture.
- Test tiny particles or grains by placing them between two pieces of an index mineral and scraping them together. If the grains are harder than the index mineral, scratches will be produced. If the grains are softer they will smear.
Hardness of Common Objects
Some people make their own hardness testing kit using a few common objects. The contents of their kit often include:
 their fingernail a copper coin a nail a piece of glass a knife blade a steel file a streak plate a piece of quartz their fingernail a copper coin a nail a piece of glass a knife blade a steel file a streak plate a piece of quartz |
| Fingernail | 2 to 2.5 |
| Copper sheet | 3 |
| Nail | 4 to 7 |
| Glass | 4 to 7 |
| Knife blade | 5 to 6.5 |
| Steel file | 5 to 6.5 |
| Streak plate | 5 to 7 |
| Quartz crystal | 7 |
This field hardness testing kit sounds like a great idea. These items cost very little, and you can pull them out of a belt pack and test the hardness of an unknown specimen in under a minute.
But, before you make your own kit, we want you to be aware of something. We checked the hardness values of "common field kit" items suggested in three introductory geology textbooks and found some of them to be highly variable. The variabilities that we found are shown in the accompanying table.
So, if you are going to use common items for hardness determination, it is highly recommended that you confirm the hardnesses of all items in your kit.
In summary,
|
your fingernail probably has a hardness between 2 and 2.5 get a real piece of copper (pennies are now made of zinc) nails are made of many types of metal of various hardnesses the hardness of glass varies between 4 and 7 knife blades vary between 5 and 6.5 don't assume that every file is made of steel we tested streak plates sold by several vendors and their hardness ranged between 5 and 7 a quartz crystal has a reliable hardness of 7 |
Test the hardness of your common items if you want to get good results when you use them.
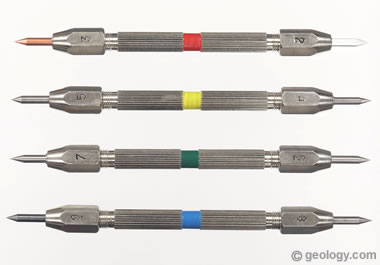
Mohs hardness picks: Hardness picks are easy to use. They have a metal stylus and an alloy "pick" that is used for hardness testing. Place the sharp point of a pick on your unknown specimen and drag it across the surface. It will either produce a scratch, slide across the surface, or leave a trace of metal. They are supplied with a hardness of 2 (a plastic point), 3 (a copper point), and 4 through 9 (carefully selected alloys). They are great for testing small specimens or for testing small grains embedded in a rock. These hardness picks are available in the Geology.com store.
Hardness Picks
An alternative to using the reference minerals for testing is a set of "hardness picks." These picks have sharp metal points that you can use for very accurate testing. The picks allow much more control, and their sharp points can be used to test small mineral grains in a rock.
The sharp picks can be used easily and either produce a scratch if they are harder than the specimen being tested or leave behind a tiny streak of metal if they are softer. Examine the test site with a hand lens to see the results of your test.
We have used hardness picks and think that they do a great job. They are easier to use and more accurate than testing with specimens. They can be resharpened when they become dull. The only downside is their price (over $100 per set).
Harder than Diamond, Softer than Talc?
Diamond is not the hardest substance known, but the materials that are harder are much more rare. Researchers have reported that wurtzite boron nitride and lonsdaleite can be harder than diamond. [1]
It is unlikely that you will find a mineral that is softer than talc. However, a few metals are softer. These include: cesium, rubidium, lithium, sodium, and potassium. You will probably never need to test their hardness. [2]
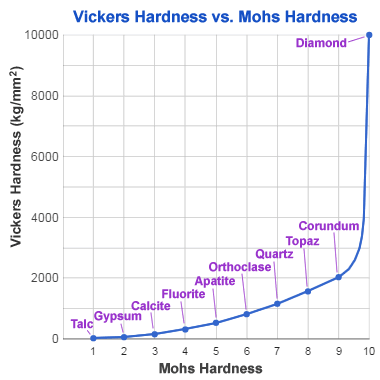
Mohs - Vickers hardness comparison: This chart compares the hardness of index minerals of the Mohs hardness scale (an integer scale) with their Vickers hardness (a continuous scale). Mohs hardness is a resistance to being scratched, while Vickers hardness is a resistance to indentation under pressure. The graph shows the great difference between the Vickers hardness of corundum and diamond - which are only one unit apart on the Mohs hardness scale.
Mohs Scale of Hardness Compared to Others
When Friedrich Mohs developed his hardness scale in 1812, very little information about mineral hardness was available. He simply selected ten minerals that varied in hardness and arbitrarily placed them on an integer scale from 1 to 10. It was a relative scale in which a mineral of unknown hardness could be tested against a group of ten index minerals to see where it positioned on the scale.
| ||||||||||||||||||||||||||||||||||||
The Mohs scale has stood the test of time and has been widely used throughout the world for over 200 years - mainly because it is easy-to-do, inexpensive, and people quickly understand it. Other hardness tests have been devised, but none of them have seen such widespread use.
A "Mohs hardness" is a relative integer-scale comparison of "resistance to being scratched." Most other hardness scales use "resistance to indentation under a stylus to which a specific amount of pressure is applied for a specific length of time." Although these tests differ from Mohs hardness in their procedure, they are all tests of the resistance to atoms being dislodged from their positions by pressure against the surface of a mineral specimen.
One of these scales is the Vickers Hardness Scale. In the Vickers test, the size of the indentation is microscopically estimated and used to calculate a hardness value. The Vickers hardness values form a continuous scale which provides more information about the hardness of minerals when compared to the integer values of the Mohs scale. A table comparing the Mohs scale minerals to their Vickers hardness is shown here along with a graph of the data. The graph shows that in terms of Vickers hardness, the gaps between the integer values of the Mohs scale are not uniform in width. In addition the gaps between minerals of higher Mohs hardness are much broader than those between the softer minerals. In terms of Vickers hardness, diamond is enormously harder than corundum.

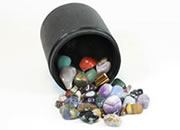
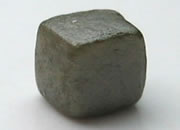
The best way to learn about minerals is to study with a collection of small specimens that you can handle, examine, and observe their properties. Inexpensive mineral collections are available in the Geology.com Store. Image copyright iStockphoto / Anna Usova.
Hardness Variations in a Single Mineral
Although reference books and websites often list a single hardness for each mineral, many minerals have variable hardness. They have greater or lesser hardness depending upon the direction in which they are being scratched.
A well-known example of a mineral with variable hardness is kyanite. Kyanite frequently occurs in blade-shaped crystals. These crystals have a hardness of about 5 if they are tested parallel to the long axis of the crystal, and a hardness of about 7 if they are tested parallel to the short axis of a crystal. Why? These different directions encounter different bonding environments in the kyanite crystal. The bonds that resist scratching parallel to the long axis of the bladed crystal are weaker than those encountered when scratching across the width of the crystal. Intermediate hardnesses are encountered in other directions.
Another example is diamond. The people who cut diamonds have known about its variable hardness for hundreds of years. They know that parallel to the octahedral crystal faces, a diamond crystal is almost impossible to saw and very difficult to polish. The diamond can be broken in this direction by cleaving, and the best method for cutting it in this direction is with a laser. The softest and best direction to saw or polish a diamond crystal is parallel to its cubic crystal faces. This information is critical knowledge for the craftsmen who plan the design of a faceted diamond. Understanding it and working with it saves time, saves money and creates a better product with less waste.
Weathering can also influence the hardness of a mineral specimen. Weathering changes a mineral's composition, with the weathering product usually softer than the original material. When testing the hardness or streak or other property of a mineral, the best way to test is on a freshly broken surface with expected luster that has not been exposed to weathering.
About Hardness Tests
The hardness test developed by Friedrich Mohs was the first known test to assess resistance of a material to scratching. It is a very simple but inexact comparative test. Perhaps its simplicity has enabled it to become the most widely used hardness test.
Since the Mohs Scale was developed in 1812, many different hardness tests have been invented. These include tests by Brinell, Knoop, Rockwell, Shore and Vickers. Each of these tests uses a tiny "indenter" that is applied to the material being tested with a carefully measured amount of force. Then the size or the depth of the indentation and the amount of force are used to calculate a hardness value.
Because each of these tests uses a different apparatus and different calculations, they cannot be directly compared to one another. So if the Knoop hardness test was done, the number is usually reported as a "Knoop hardness." For this reason, Mohs hardness test results should also be reported as a "Mohs hardness."
Why are there so many different hardness tests? The type of test used is determined by the size, shape, and other characteristics of the specimens being tested. Although these tests are quite different from the Mohs test, there is some correlation between them. [2]
Hardness, Toughness, and Strength
When testing for hardness, remember that you are testing "the resistance to scratching." During the test, some materials might fail in other ways. They could break, deform, or crumble instead of scratching. Hard materials often break when subjected to stress. This is a lack of toughness. Other materials might deform or crumble when subjected to stress. These materials lack strength. Always keep in mind that you are testing for the resistance to being scratched. Don't be fooled by other types of failure in the specimen being tested.
Uses for Hardness Tests
The Mohs Hardness Test is almost exclusively used to determine the relative hardness of mineral specimens. This is done as part of a mineral identification procedure in the field, in a classroom, or in a laboratory when easily identified specimens are being examined or where more sophisticated tests are not available.
In industry, other hardness tests are done to determine the suitability of a material for a specific industrial process or a specific end-use application. Hardness testing is also done in manufacturing processes to confirm that hardening treatments such as annealing, tempering, work hardening, or case hardening have been done to specification.
| Information Sources |
|
[1] Scientists Discover Material Harder Than Diamond - Lisa Zyga, website article on Phys.org, February 2009. [2] Mohs Scale of Mineral Hardness: Wikipedia article, last accessed August 2022. [3] Material Hardness: website article, Center for Advanced Life Cycle Engineering, University of Maryland, last accessed August 2022. |
Some Notes on Spelling
Mohs Hardness Scale is named after its inventor, Friedrich Mohs. This means that an apostrophe is not needed when typing the name of the test. "Moh's" and "Mohs' " are incorrect.
Google is really smart about these names. You can even type "Moe's Hardness Scale" as a query and Google knows to return results for "Mohs Hardness Scale." :-)
| More Minerals |
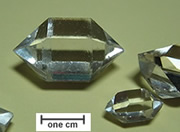 |
Herkimer Diamonds |
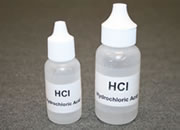 |
The Acid Test |
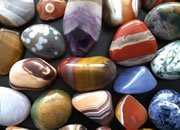 |
Tumbled Stones |
 |
Zircon |
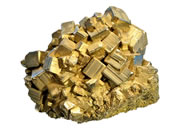 |
Fool*s Gold |
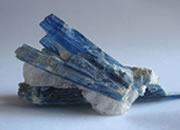 |
Kyanite |
 |
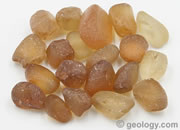
Rock Tumblers |
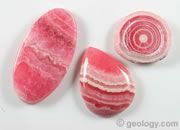 |
Rhodochrosite |

Find Other Topics on Geology.com:
|
| ||

|
| ||

|
| ||

|
|